Making a whole turkey is one of the most daunting tasks when it comes to Thanksgiving. A lot of this comes from the fact that turkey is often seen as the centerpiece dish of the table (even if some of the sides are arguably better), in addition to the hefty price tag that comes with this festive bird. It makes sense that nerves may be high when prepping this dish, but I am here to alleviate that stress for you.
I aim to make this bird as approachable as possible by giving you the step-by-step recipe and technique-driven tips I learned at culinary school that will make this recipe a breeze.
To start this off, everyone say it with me: “Turkey is basically a bigger chicken, and I am not afraid of it.” Listen, confidence is half (okay, maybe 25%) of the battle, so calm down and remember that you are in the driver’s seat, NOT the turkey.
I am first going to go through some of the important steps and decision-making process and then dive into the recipe + a PDF printout for you!
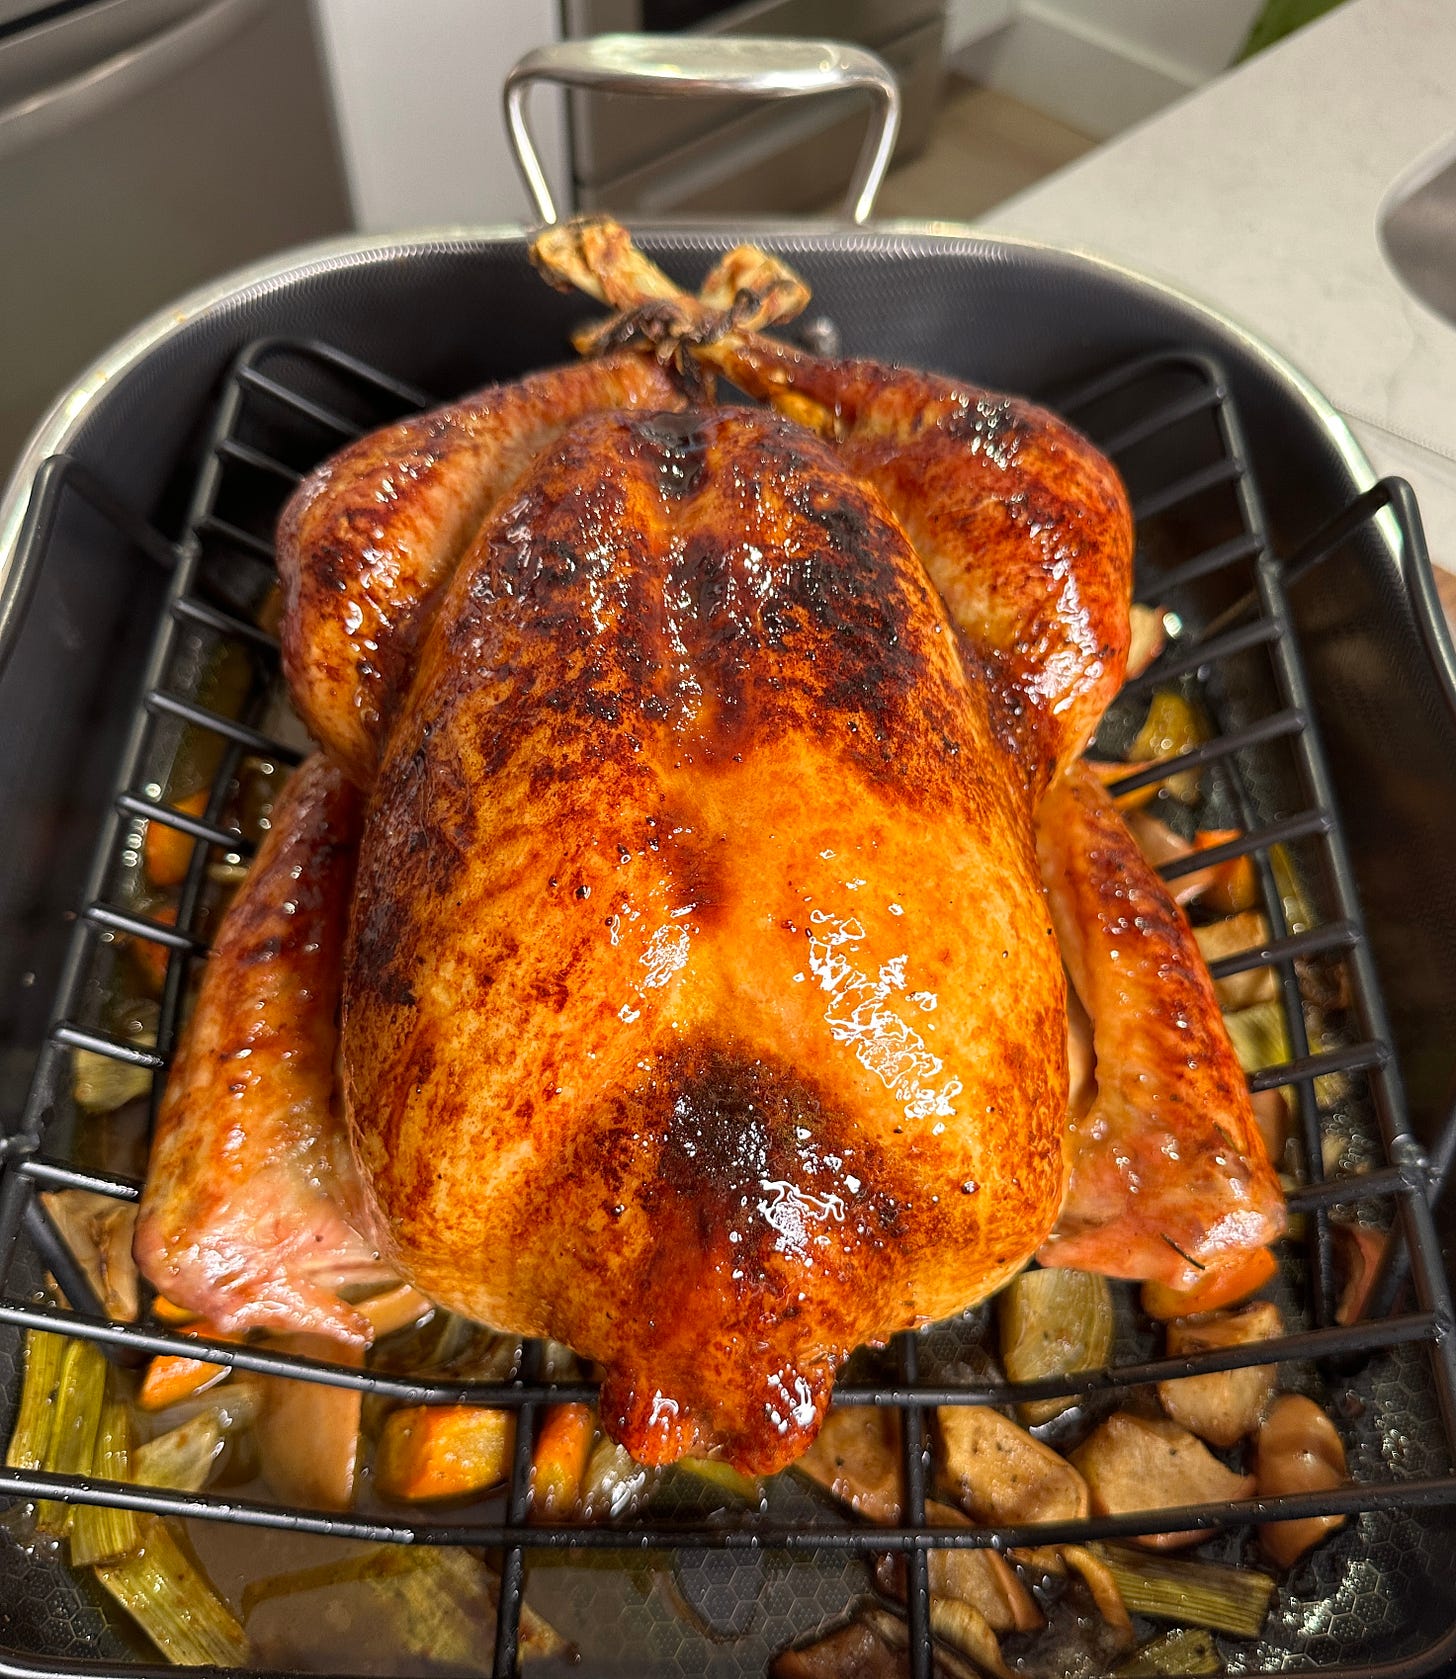
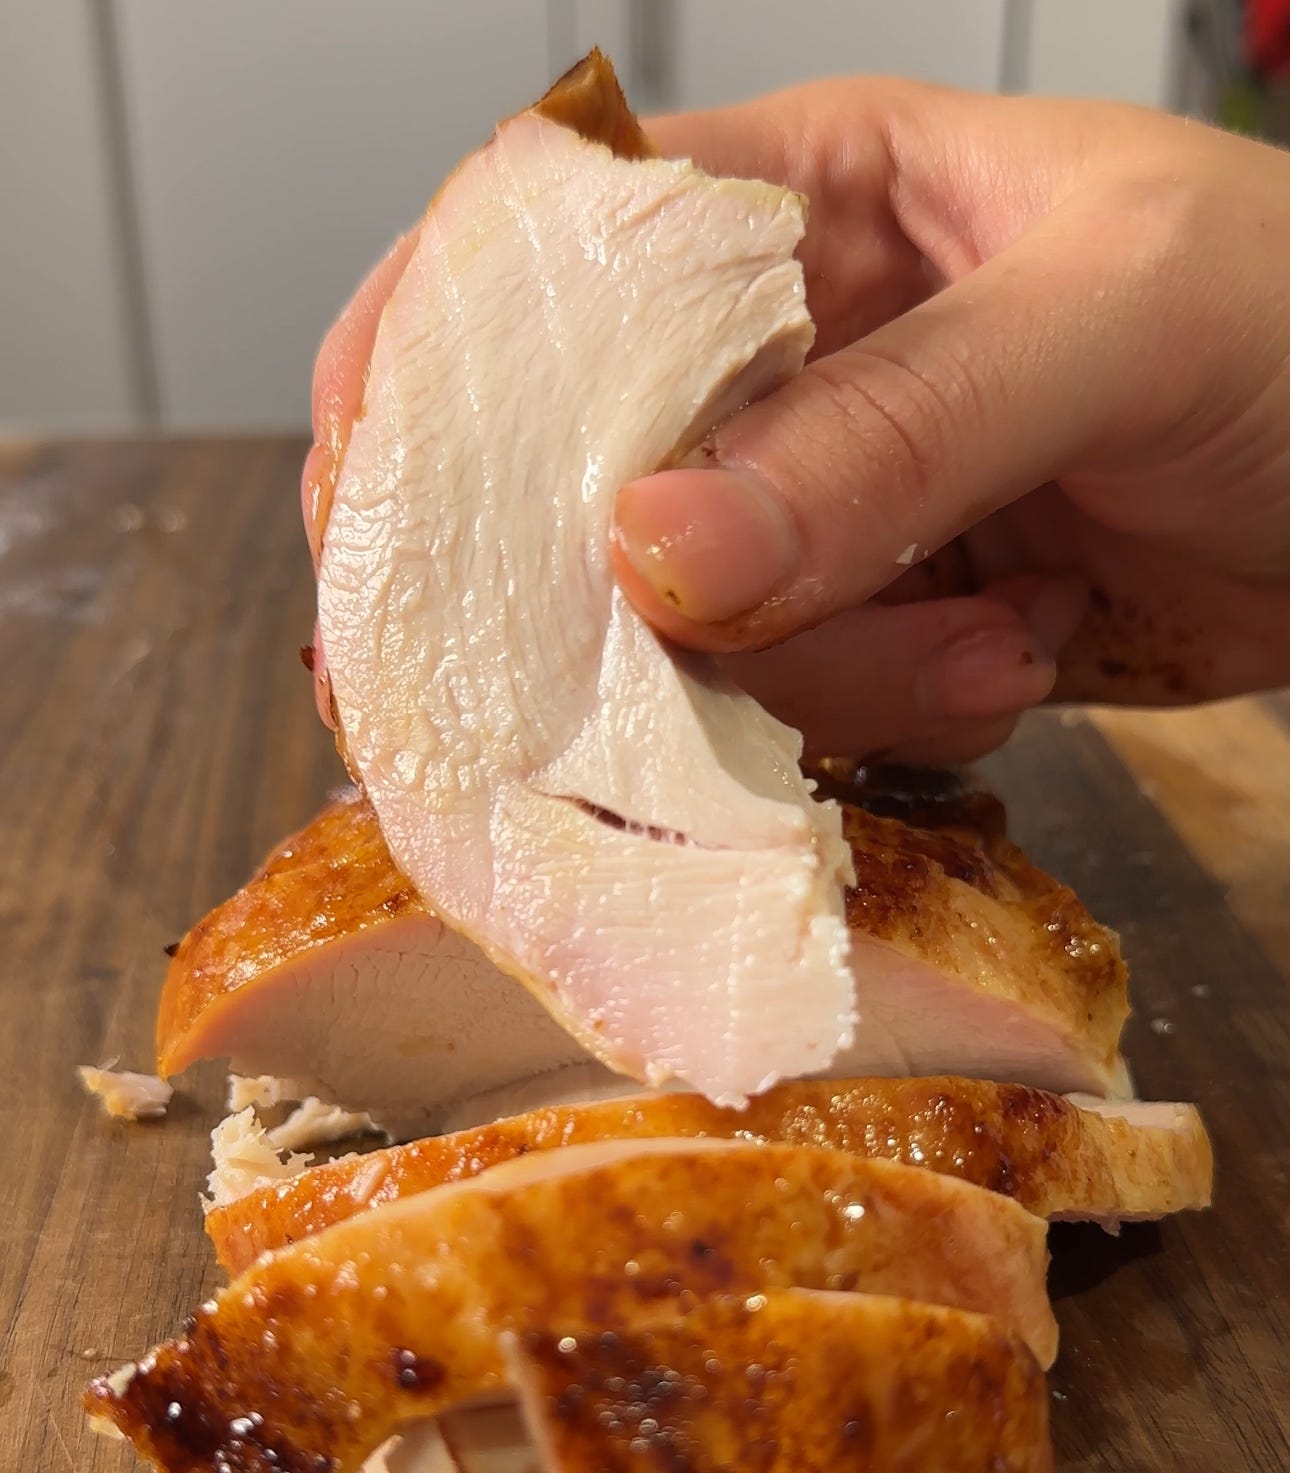
Step 1 – The PREP
I like to start my turkey prep 2 days before. And if the thought of you stresses you, hear me out. All it takes is about 10 minutes of prep work, then you set it and forget it. Then, when the big day comes, you’ll feel relieved that the process has already been started and you’re on your way to the perfect bird.
Dry brine vs Wet brine?
First of all, what the f$$k even is a brine? Brining is the process of infusing proteins with salt, sugar, and flavor. In addition, it tenderizes and moisturizes meat.
Typically, the protein is soaked in a solution of water (or another liquid such as apple juice, beer or wine), salt, and spices for a number of hours in the refrigerator. This is the most traditional method known as a wet brine. Another method is known as the dry brine, in which salt and other aromatics are rubbed onto the skin of the protein and set to chill for a few hours or days. The salt draws moisture out of the meat, which dissolves the salt and creates a concentrated brine. The brine is then reabsorbed into the meat, seasoning it and making it more tender and juicy + allowing for ultra-crispy skin.
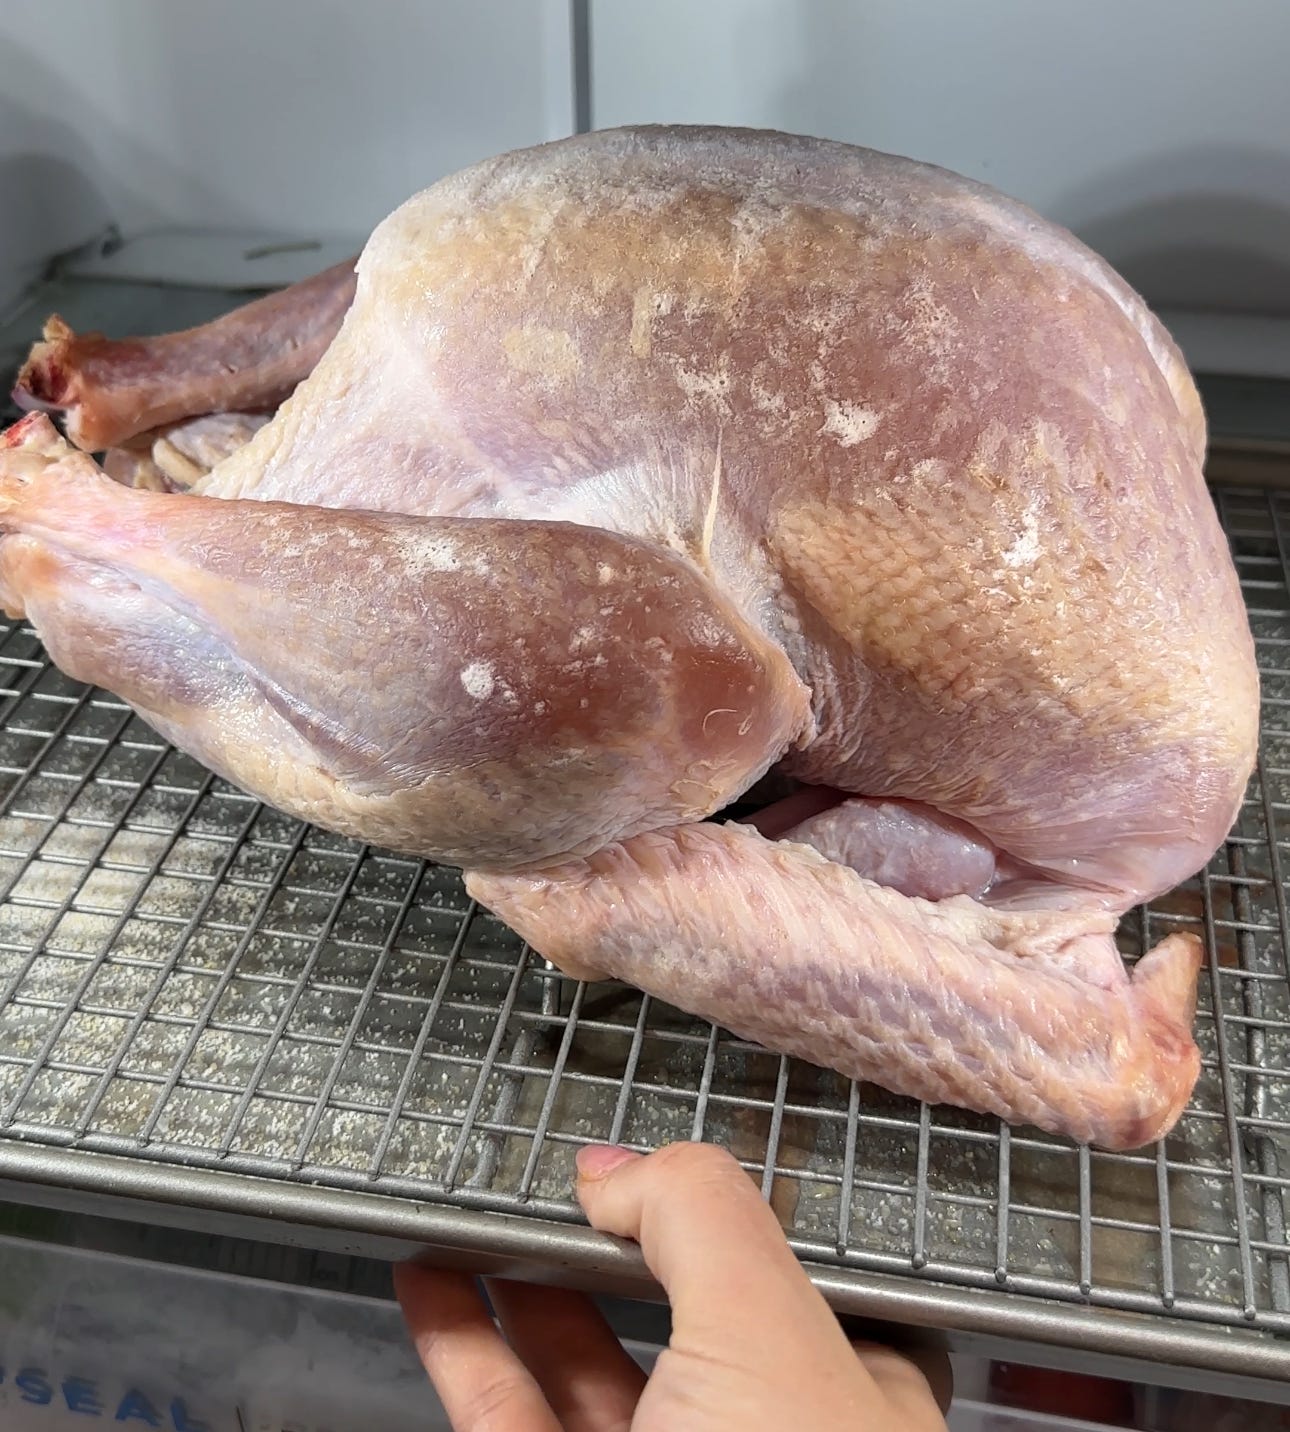
I prefer to use a dry brine when brining a big bird like a turkey and let it set uncovered in the fridge for 24-48 hours. Not only is it much easier and neater to store (imagine the horror of spilling raw turkey water all over your fridge), but it also skips the step of drying out the skin later, which is necessary for extra crispy skin. And NO, you don’t rinse out the salt once it’s done brining. You just want to make sure you use the right amount:
1 tbsp Kosher Salt (I only use Diamond Crystal) = every 5 lbs of turkey
1/2 tsp Baking Powder (helps make the skin even crispier) = every 5 lbs of turkey
1/2 tsp Brown Sugar (for flavor and bronzing) = every 5 lbs of turkey
Step 2 – Getting the bird oven ready
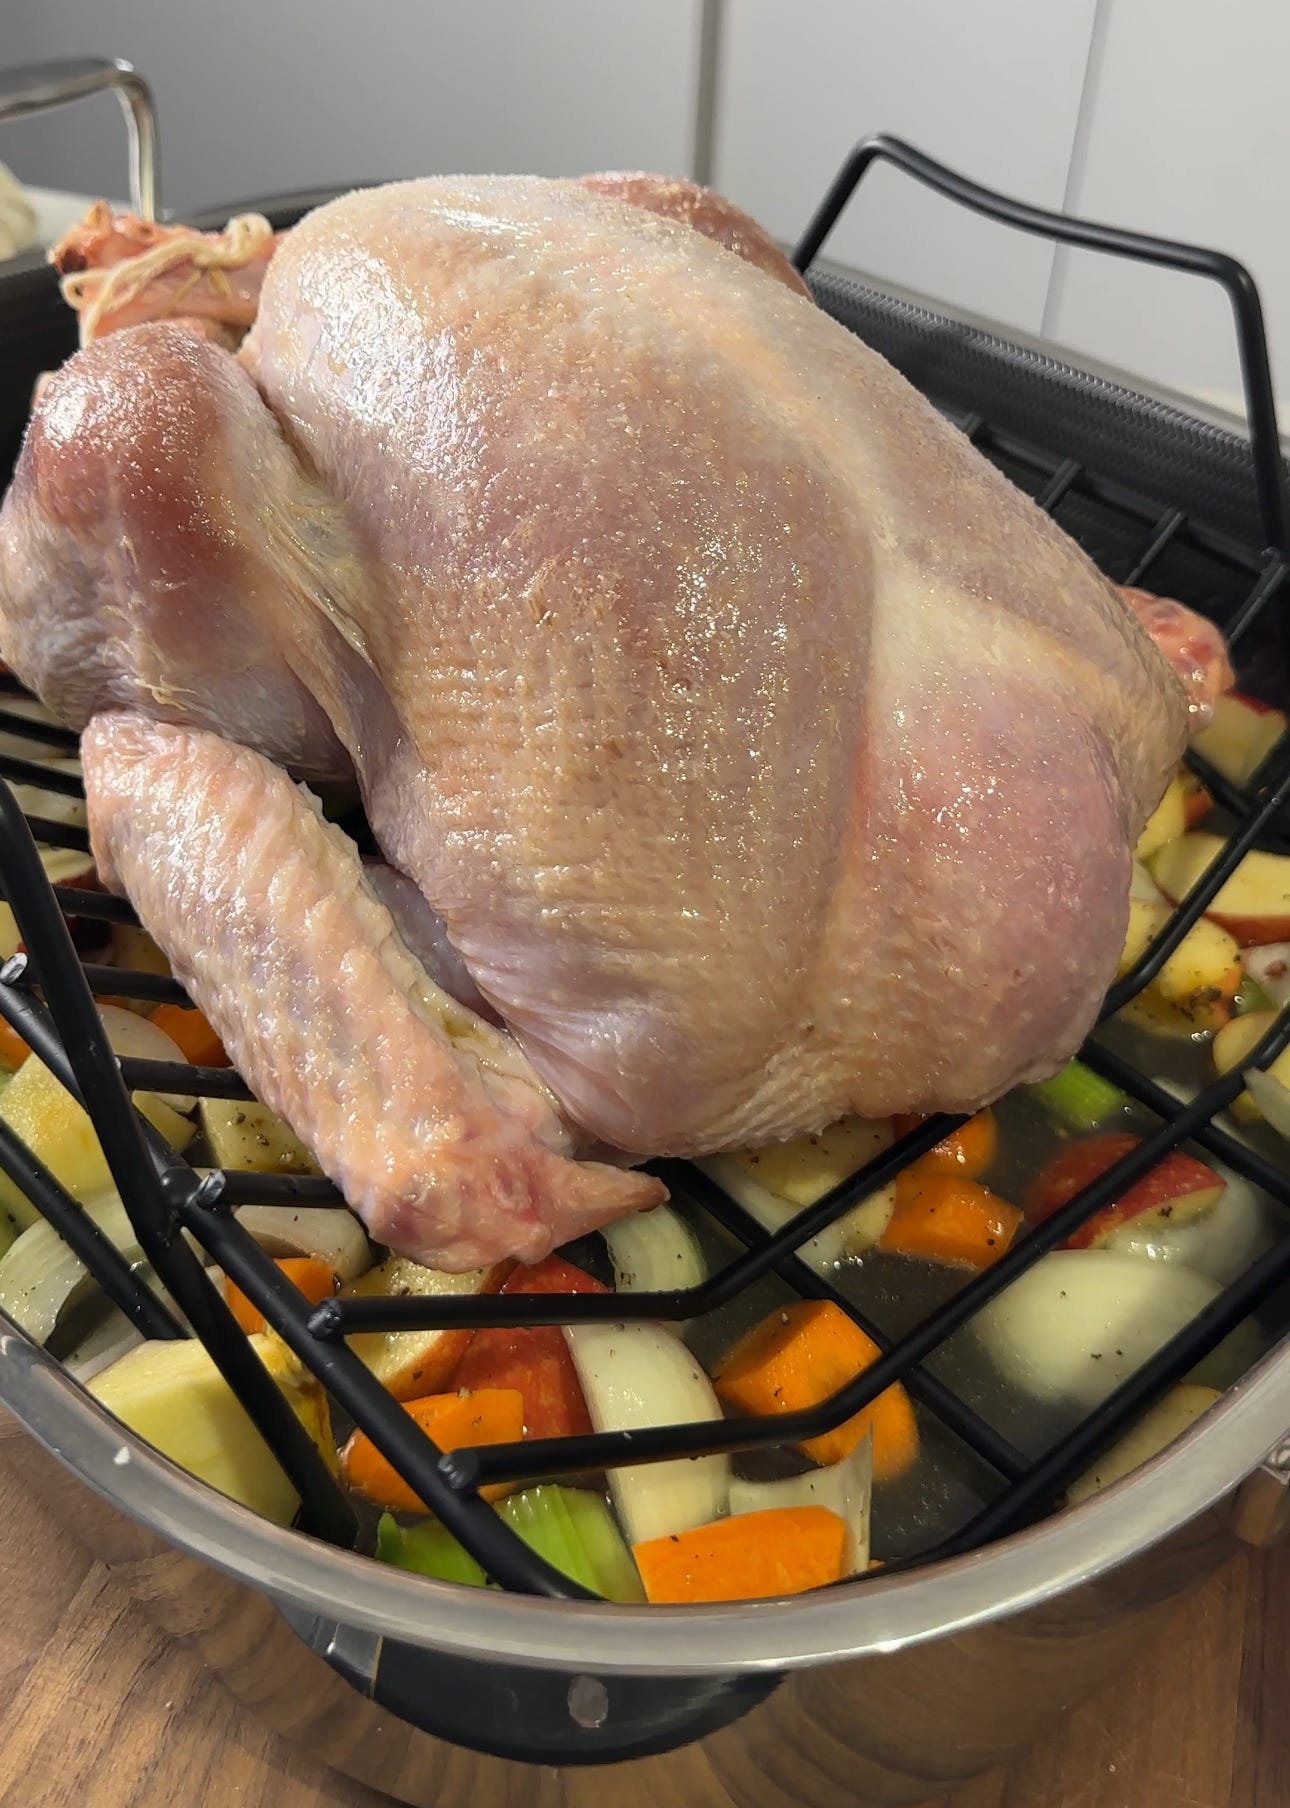
When it’s time to get the bird in the oven, I prefer a more straightforward approach. I get a bed of seasoned veggies + an apple (for sweetness), lay the bird on top of a wire rack, and stuff the bird with herbs, lemon, and an apple.
When it comes to the skin, rather than adding butter immediately (which has a lot of moisture in it), I opt for olive oil to start (I’ll later baste with butter) and one more sprinkle of salt.
Step 3 – Into the oven
Let’s talk about oven temps and cooking times, perhaps the most finicky of it all. In reality, everyone’s oven is a little different, so this is the time you really want to dial in and pay attention. Also, my rule of thumb is it’s easier to cook something longer if it’s undercooked, but you can’t take it back once it’s overcooked. So, with that said, if you’re uncertain, just pull the bird, and then if it needs more time, you can pop the sections of the bird back in as necessary as you start cutting it up.
I like to start hotter at 400 F for the first 30 minutes to get the crisp going on the skin and then drop it down to 350 F for the remainder of the cook. Also, I basted the bird every 15-20 minutes, and rotate it every 30 minutes.
The general rule is about 13 minutes per pound of unstuffed turkey (the above method is considered unstuffed).
My bird was 10 lbs, and it took a little over two hours. A good rule of thumb to check if it’s done is making sure the leg juices run clear, and you get an internal temp between 155 and 160 F… carry over cooking as it will take it the rest of the way.
Step 4 – Let it Rest
The most important thing to remember is to let the bird REST for at least 30 minutes. This will let the juices settle evenly and bring the bird to the perfect temperature.
OKAY, that is all the in-depth info for now….more to come on carving the turkey later. Below, you’ll find the streamlined recipe!!!
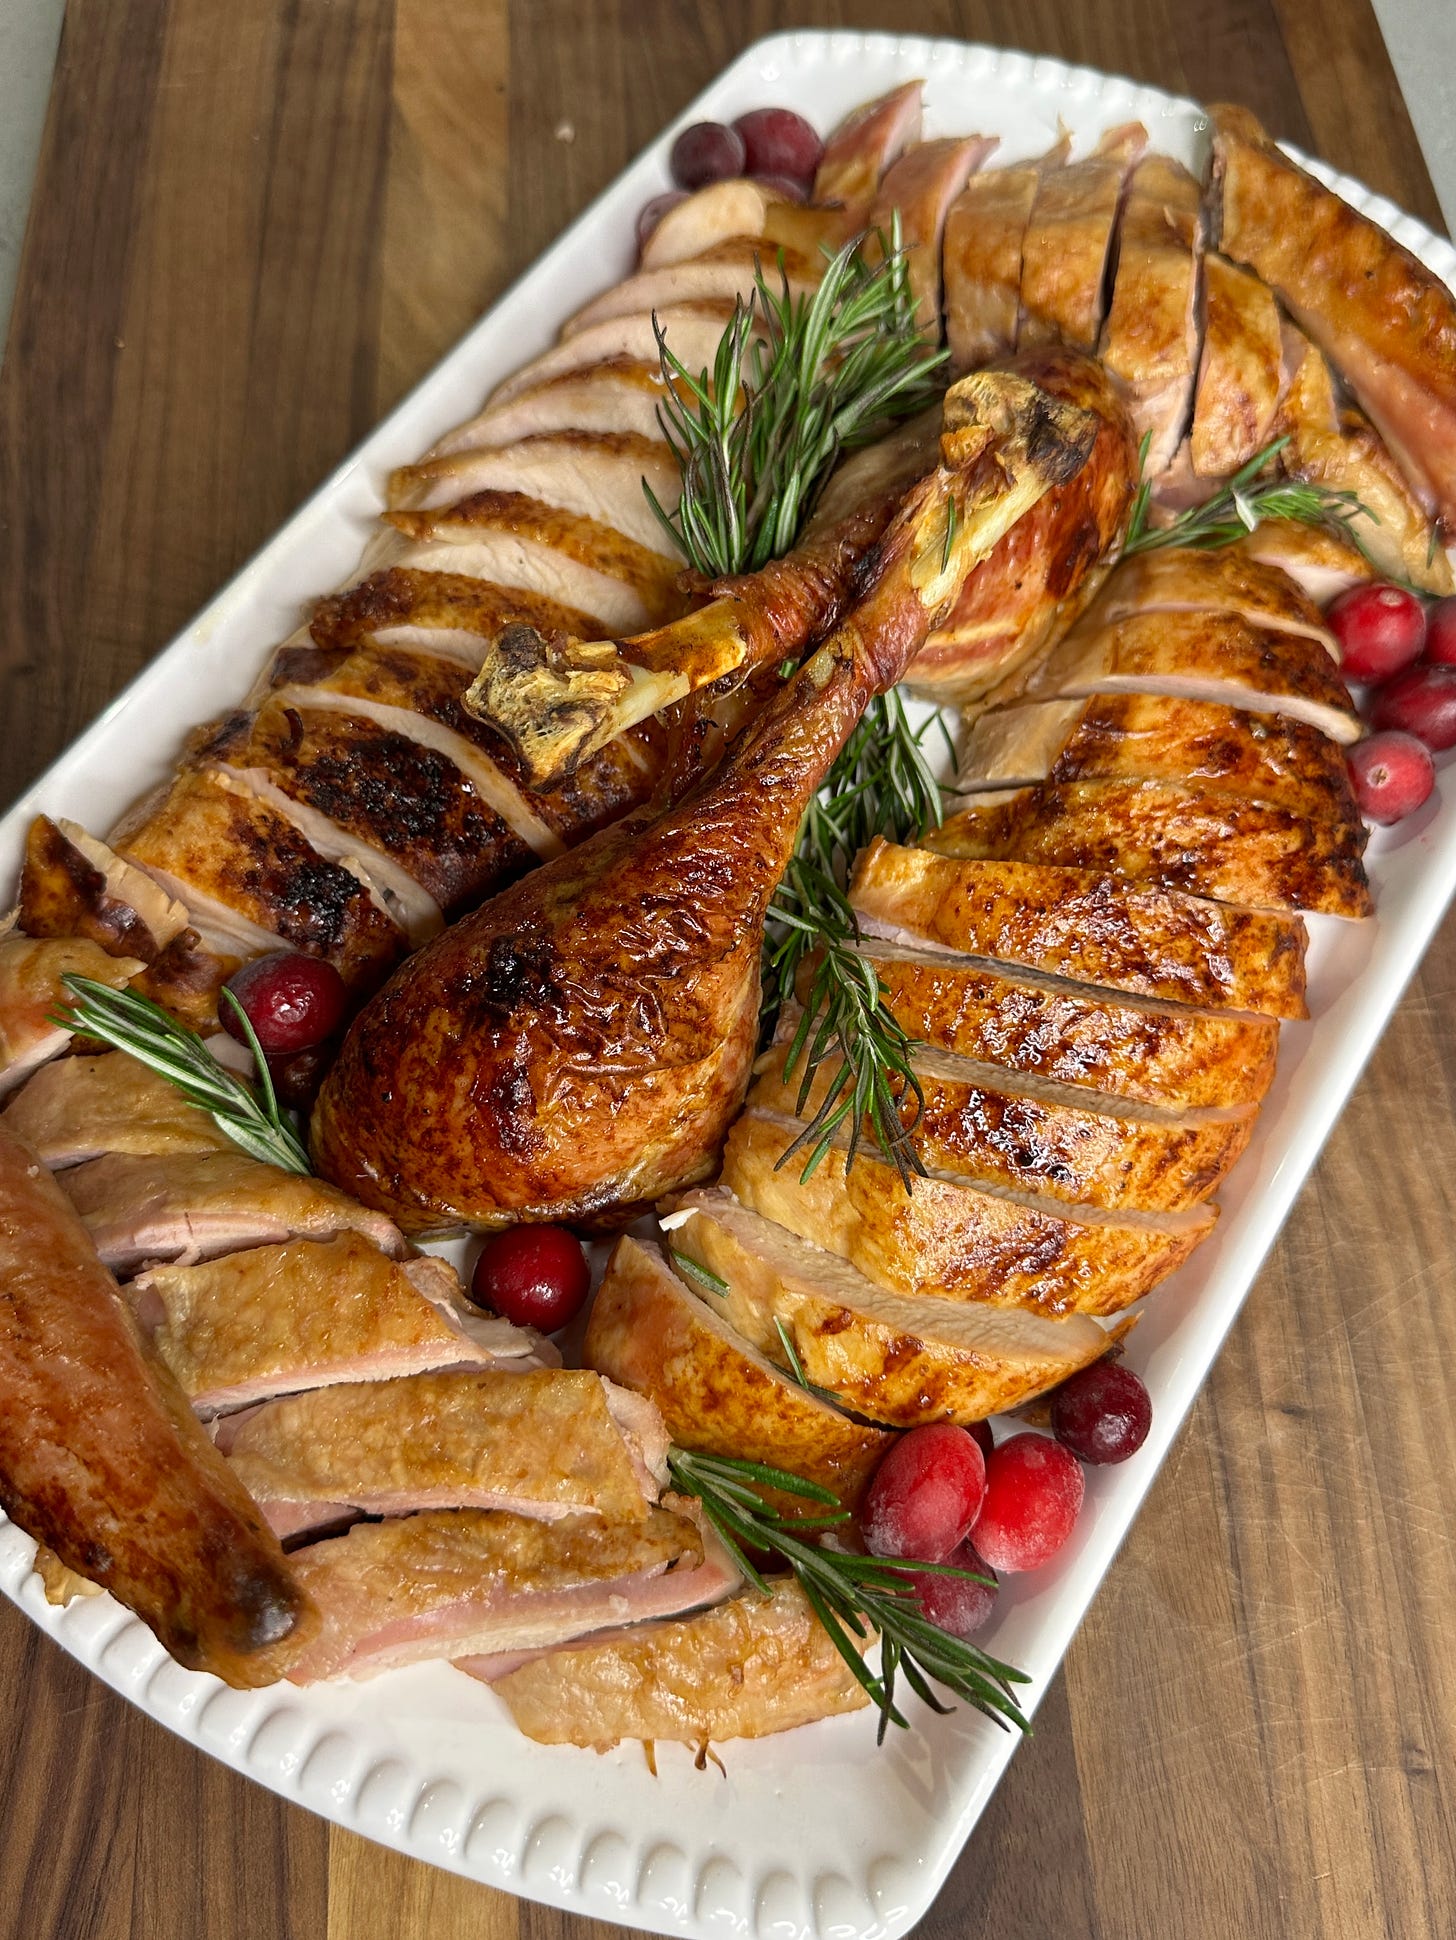
Honey-Soy Glazed Turkey
Ingredients
Turkey Ingredients
- 10-12 lb turkey or whatever size you need, fresh or fully thawed
- Diamond Crystal Salt…. 1 tbsp per 5lbs
- Brown Sugar…. 1/2 tsp per 5lbs
- Baking powder.. 1/2 tsp per 5lbs
- 4 large carrots peeled and chopped 1-2 inch pieces
- 4 stalks celery chopped into 1-2 inch pieces
- 2 large onions 1 roughly chopped, the other halved
- 2 apples 1 cubed, the other halved
- 1 lemon cut into quarters
- fresh sage
- fresh rosemary
- fresh thyme
- olive oil
- salt and pepper
- 2-3 cups of Turkey stock can sub for veggie or chicken
Soy Honey Basting Butter Ingredients (adjust up for a bigger bird)
- 1 stick butter
- 1/2 tbsp soy sauce
- 1 tsp honey
- 1 large spring rosemary
- 2 cloves garlic smashed
Instructions
1-2 days before
- Remove the turkey from all packaging. Remove the giblets and neck (commonly located in the center cavity and the front of the bird.) Gently separate the skin from the body of the bird from the back and front. Take care not to make any holes. Using paper towels, completely dry the inside and outside of the turkey. Place on a wire rack sheet tray.
- In a small bowl, combine the kosher salt, baking powder, and brown sugar until evenly mixed. Evenly sprinkle the salt mixture all over the entire bird — both outside and inside the cavity + under the skin. Place the turkey uncovered into the fridge for at LEAST 12 hours, but 24-48 hours are preferred.
The day of
- Remove the bird 1 hour before you plan to put it in the oven. While the bird comes to room temperature, cut up the carrots, celery, onion, apples, and lemon, + get out the herbs. Preheat the oven to 400 F.
- Combine the carrots, celery, onion, and chopped apple in the bottom of a large roasting pan. Drizzle over olive oil, salt, and pepper, and toss well to coat. If you have a wire rack, place it on top.
- Fill the bird’s cavity with a few springs of sage, thyme, and rosemary, then add an apple halve and the lemon. Cross the legs and use twine to make a tight knot. Place the other apple half in the front of the bird and tuck excess skin in. Drizzle the turkey skin with olive oil and add a final sprinkle of kosher salt. Pour 1 cup of stock onto the veggies at the bottom.
- Place the tray in the 400F oven for 30 minutes, rotating halfway through. Meanwhile, make the butter baste.
- Combine the butter, soy, honey, garlic, and rosemary in a small pot over medium heat until bubbling and fragrant, about 5 minutes.
- Reduce the oven to 350 F and begin basting the bird every 15-20 minutes, AND rotate the pan in the oven every 30 minutes for evening browning. If you see the skin getting too dark, cover it with foil. Also, if the stock becomes too reduced, add more liquid. I added an additional 1.5 cups of stock.
- The general rule is about 13 minutes per pound of unstuffed turkey. My 10 lb was cooked at 350 for about 1 hour and 40 minutes (+ the first 30 minutes). A good rule of thumb to check if it’s done is to make sure the leg juices run clear and you get an internal temp between 155 and 160 F on a thermometer. Carry over cooking, as it will take it the rest of the way.
- Allow the bird to rest covered with foil for 30 minutes before carving and serving.
- ENJOY!!
Have a question? Feel free to comment below!!!
Tried it out? Send me a picture and leave a review!! I love to see how your recreations turn out ❤️
Hey super excited to try this. I really enjoy your content and you are hard not to love. You remind me of family. For the basting butter soy mix if I’m doing it every 30 minutes, do I keep it hot on the stove? If not won’t it return to a solid?